|
|
Managing displayed data with templates |
|
|
The information in this topic relates to deprecated functionality. |
Note that this information applies to the Design window's Format Display dialog only
For information on 3D window templates, click here.
Introduction
Data Display Template Essentials
Automatically Creating Overlays on Loading Data
Creating a New Data Display Template
Configuring/Editing an Existing Display Template
Applying an Existing Template to an Object Overlay
Creating a New Template from an Existing Overlay
Using a New Display Template in Multiple Projects
Setting up a Template to Automatically Create an Overlay
Design Window Display Templates
Prerequisites
-
If you are not familiar with the concept of overlays and the viewing hierarchy, you should read the View Hierarchy help topic before viewing the following information.
Overlays represent a view of an object in memory.
This topic covers the subject of applying Display Templates to the Design window only.
For more information about the more recent 3D window template functions, click here...
How this data is presented is essential to creating a working environment that is both clear to all involved and portrays a useful interpretation of real-world geotechnical data. In the most simple form, this could be the selection of a single color to draw all aspects of an object, but this concept can be greatly extended when you bear in mind the level of information that an overlay can contain; draw style, display legend, shading mode, rendering mode, symbol design, annotation,drawing order, downhole column format, on- and off-section control are just some of the features that are stored within an overlay.
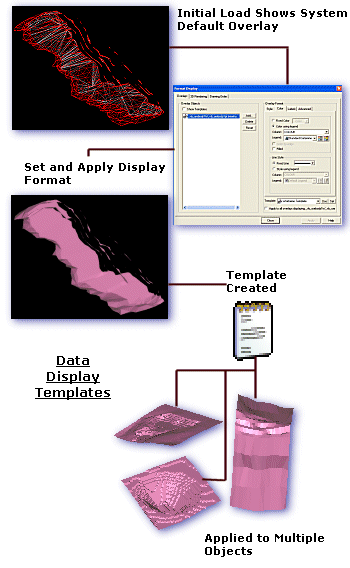
The same applies to data display templates. They also have capacity for storing an equable amount of formatting information, with the main difference between it and a standard overlay being that it can be applied to more than one object, and can be used to create overlays automatically when a object of a certain type is loaded. Templates can also be created as external files, transferable to separate projects (although there are implications for the transfer of data display information - see 'Using Display Templates', below).
In addition to using templates to control the way the view in the Design or Plots window is displayed, it is also possible to use templates to quickly create plot views in a standard (predefined) layout, using your application's Plot Templates System. This facility allows repetitive plot and log view layout operations to be stored in template form. This is ideal if a particular corporate standard is required for corporate data presentation.
Find out more about Plot Templates...
Data Display Template Essentials

Data Display Templates allow you separate style and content in your projects; a template contains all the data display instructions (simple or complex), and can be stored either in memory for use within the current project, or can be transferred to an external file for use in another project (although there are implications for this approach, which is discussed below).
Data display templates can be used to:
-
apply the same display format to multiple objects in memory (subject to limitations, see below)
-
apply the same display format to objects in different projects (subject to limitations)
-
automatically create an overlay or overlays each time data of a particular type is loaded into memory

Data display templates are saved with the current project file, so will be available the next time a project file is loaded. You can also elect to save template information to an external template (.tpl) file for subsequent import into any project.
A data display template can contain variety of information. In a simple form, a template could be used to, say, color an object red, and rendered in 3D. This type of display template is relatively generic and can easily be transferred to other object overlays of the same object type (it is not possible to apply, say, a wireframe display template to a block model, for example).
Data Display Template Restrictions
However, a different situation occurs when a display template includes information that is specific to a type of data, or a specific data object. This could be the case if, for example, a block model display template is set up so that a particular legend is used to display the presence of a particular g/t of gold. This type of template could be re-used with the same object, of course, but if an attempt were made to apply it to another block model file, with no AU data column, data would not be drawn as expected - in fact, the default display method would be used for drawing the second block model. This is because it was not possible to match the information in the default template with the contents of the incoming file, resulting in a display format 'failure'.
The same applies when using a template within a range of objects of the same data type. As your application permits a large degree of flexibility with regards to the data columns that can be included in an object's database, it is still important that, when defining a default template for use on multiple objects, the objects that are affected must be of an internal structure that is relevant to the template being applied. If a particular field is referenced, for example, in a specified legend, that field must be present on the 'receiving' object for any display format other than the default to be drawn. Similarly, if a legend is of the ranged variety, the values that are encompassed must also be complimentary to the object in question; if a legend dictates that CU grades between 0.90 and 1.15 will be colored green, for example, and the template that 'contains' the legend is applied to another block model which only has CU grades below 0.8, the display of the data will be shown in the default legend (or if an absent value color is specified, that will be used instead).
There are ways around this situation: you can define your legend values in terms of percentages of a total range, or you can create a 'master' legend that will more than cope with grades across a multitude of block model files. The extent to which you standardize your display templates depends very much on your requirements - if you wish to adopt a standard display format for all current projects, it may be necessary to devise an all-encompassing display template beforehand by studying the underlying data of data objects across the range.
Automatically Creating Overlays on Loading Data
Data display templates can be applied manually to objects as required, or they can be used to automatically create an overlay (or even multiple overlays) each time data of a particular type is loaded, using the Apply on Load feature. For example, you could load a drillhole data set which automatically created separate overlays to display downhole columns showing a histogram, a lithology bar, borehole ID annotation and so on. If you use a common data display format for more than one situation, this facility can save you a lot of display formatting time.
If a template is set to automatically create an overlay, this will be performed as soon as the object is loaded. For example, you could create two wireframe templates, both set to Apply on Load. Template 1 may render a wireframe mesh, and Template 2 could display an intersection with the view plane. In this situation, whenever a wireframe file is loaded into memory, two templates are created and enabled (displayed). You can edit these overlays in the same way as any other, or, you can edit the templates and re-load the wireframe data. As with any template, any changes made to it will affect all overlays it is applied to, automatically on loading or otherwise.

To specify automatic overlay creation when creating a template:
When adding a new data display template (see the 'Step by Step' procedures, below, for more information on how to do this), you can select the Apply on Load check box. This will create a template that will automatically create an overlay of the specified settings each time a particular data type is loaded.
To edit an existing template to enable automatic overlay creation:
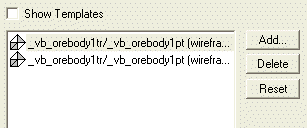
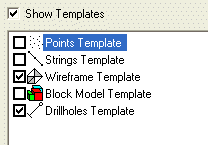
This is achieved by selecting the check box next to a template in the overlay objects list (shown when the Show Templates check box is selected):

|
|
The Apply on Load settings are only relevant to the current session. For example, if you have defined three templates for a block model data type and all of these are to be used to create an overlay when a block model is loaded, this will occur when you load any subsequent data of this type in the current session. If you have existing block model data loaded, overlays will not be created for this data (although you could easily create these manually, if required). If objects are set to 'Auto-reload' when a project is reopened, and Apply on Load templates exist within the project, automatic overlays will NOT be created when the project is reloaded ( this would cause the list of overlays to become appended each time a project is opened). |
Display Template Procedures
There are many scenarios in which a display template could be useful. Some of the more common situations are:
Creating a New Data Display Template
-
Ensure the Design window is in view.
-
Using theDesign Viewribbon, selectFormat | Overlays
-
Ensure the Overlays tab is selected, and select the Show Templates check box on the right-hand side of the dialog.
-
A list of all currently-defined templates for the active project is shown in the Overlay Objects list.
-
Click Add. The Add Template dialog is displayed.
-
Enter a Name for your new template.
-
Select the data type that the template will apply to, e.g. Points.
-
If you wish for the template to be used to create an overlay automatically every time a file of the selected data type is loaded into memory, select the Apply on Load check box. Otherwise, leave this check box blank (you will need to manually apply the template to created object overlays).
-
Click OK.
-
Close the Format Display dialog.
Configuring/Editing an Existing Display Template
-
Ensure the Design window is in view.
-
Using theDesign Viewribbon, selectFormat | Overlays
-
Ensure the Overlays tab is selected, and select the Show Templates check box on the right-hand side of the dialog.
-
A list of all currently defined templates for the active project is shown in the Overlay Objects list.
-
Select a template in the list to highlight it, and edit the Overlay Format as required (for more information on a particular tab, see the online Help for the Format Display Dialog.
-
Close the Format Display dialog.
Applying an Existing Display Template to an Object Overlay
-
Ensure the Design window is in view.
-
Using theDesign Viewribbon, selectFormat | Overlays
-
Ensure the Overlays tab is selected, and ensure the Show Templates check box is clear, and that a list of current object overlays is shown.
-
Select an object overlay from the list.
-
Select an existing Data Display Template from the Template drop-down list.
-
Click Apply next to the Template drop-down list.
-
Click Apply.
-
Close the Format Display dialog.
Creating a New Template from an Existing Object Overlay
-
Create a new display template as shown in the initial procedure, but do not close the Format Display dialog.
-
Clear the Show Templates check box to show a list of object overlays.
-
Select the object overlay from the list that you wish to use to create a template.
-
Select your new template from the Template drop-down list (if this isn't displayed, close and re-open the Format Display dialog).
-
Click Save. The current display format will be copied to the selected template.
-
Ensure the Show Templates check box is clear, and that a list of current object overlays is shown.
-
Close the Format Display dialog.
Using a Display Template in Multiple Projects
-
If required, create a new display template as shown in the initial procedure, but do not close the Format Display dialog.
-
Click Export and select a filename and location. Files will automatically be saved with a .tpl extension, and all display templates currently listed will be stored in the external file.
-
Close the Format Display dialog.
-
Save your project, and reload an alternative project.
-
Using theDesign Viewribbon, selectFormat | Overlays
-
Select the Overlays tab.
-
Select the Show Templates check box.
-
Click Import, and locate the saved .tpl file. Once loaded, all saved data display templates will be shown in the list, and can be applied to any overlay of the corresponding data type.
-
Close the Format Display dialog when finished.
Setting up a Template to Automatically Create an Overlay
-
If required, create a new display template as shown in the initial procedure, but don't close the Format Display dialog.
-
Select the Show Templates check box.
-
Select the check box next to the template(s) you wish to use to automatically create overlays when a file of a particular data type is loaded.
-
Close the Format Display dialog.
|
|
Related Topics |
|
|
3D Window Templates Format Display Dialog: Advanced Format Display Dialog: Style tab Format Display Dialog: Overlays tab Add Template Dialog |


